How To backup Any Android Devices – Kunwar Lab
There is a lot of times we lost the data because of our phones crashes due to some sort of virus attacks or it might crashes sometimes unexpectedly or we lost the phone which is the most common case, so we need back up all our data and contacts time to time so we can access of those files which we might lose.
To get that data safe, you need to enable cloud backups for as many things as possible, so that logging your account into a new handset transfers most of the data automatically to another phone easily. But not everything can be backed up that way, and that’s why it very important to take regular backups of your phone on time to time.
While some of the great third-party apps are found on the app store like Titanium Backup It will let you take a full backup of your Android phone but those apps are not for everyone. Most users don’t know about rooting their phones which is a little bit tricky and you need some technical knowledge to do that or maybe you don’t want to mess around with installing ADB drivers. No worry, it may take a few more steps, but you’ll get there very easily.
Here’s how to back up almost any Android Devices.
Backing up using Gmail Account
- On your phone, go to Settings > Accounts & sync.
- Under ACCOUNTS, and tick mark “Auto-sync data“. Next, tap on Google. Now, tap on the Gmail ID you used to sign onto the phone.
- Here, you can turn on all the options so that all your Google related information gets synced to the cloud. This includes your contacts, photos (uploaded to Google+, privately if you want), app data, calendar events, Chrome tabs, your Google Fit data and more.
- Now go to Settings > Backup & Reset.
- Check Back up my data.
This will save app data and all of your phone’s settings including Wi-Fi passwords to your Google account. When you sign in using this Google account on another phone, all of your preferences, photos (via Google+), and contacts will be imported automatically.
This data is synced regularly and you just need to log into another device with the same account to recover it. This does not cover your text messages and various other types of data – you’ll have to back them up yourself.

Next, you’ll want to save the music, movies and other media you’ve saved on your phone’s memory card. This process is easy – just connect your phone to a PC and copy everything that’s in the microSD card. This is a manual process so you’ll need to make a routine of doing this.
Multimedia
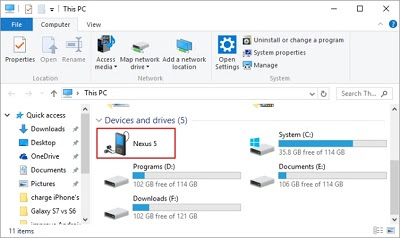
- Connect your phone to the computer with a USB cable. If you are on a Mac, make sure you have the Android File Transfer application installed before you do this.
- Open My Computer on your PC, or Finder on your Mac.
- Navigate to the SD card and copy all the files you want to save to your computer.
- After the copying is done, you can unplug your phone.
Text Messages
- Download SMS Backup+.
- Open the app and tap Connect.
- Pick your Gmail account from the pop-up.
- Now grant SMS Backup+ permission to access your Google account.
- Now go back to the app and tap Backup. This will save all your text messages to your Gmail account.
- Log in to Gmail from any Web browser and on the left side you’ll see a new label – SMS. Click it to view all the text messages that have been backed up.
- To restore these messages, just tap Restore in SMS Backup+.
- Tap OK in the pop-up.
- You’ll be asked to set SMS Backup+ as your default SMS app. Tap Yes. This is needed to restore messages.
- Now the app will automatically restore all your messages and call logs. Once the process is complete, the app will show a pop-up that restores your default SMS app. Tap Yes.
